
4 posts tagged with "jwt"

View All Tags

· 2 min read
Josh Twist

We're working on adding support for Firebase auth to Zuplo (as we did with Supabase) and in doing so came across their JWT signing approach which is one of the more unusual. They sign their tokens with certs and they publish these certs at a well-known URL: https://www.googleapis.com/service_accounts/v1/metadata/x509/securetoken@system.gserviceaccount.com.

It took us a while to work out how to validate these JWT tokens using our preferred library: Jose.

Hopefully this will save you some time if you're trying to do the same thing. Note that we cache the certs in memory since they do not change often (hopefully!).

let publicKeys: any;

const getPublicKeys = async () => {
if (publicKeys) {
return publicKeys;
}
const res = await fetch(
`https://www.googleapis.com/service_accounts/v1/metadata/x509/securetoken@system.gserviceaccount.com`
);
publicKeys = await res.json();
return publicKeys;
};

// This goes
// inside your auth function or middleware

const authHeader = request.headers.get("authorization");
const token = authHeader.substring("bearer ".length);

const firebaseProjectId = "your-project-id";

const verifyFirebaseJwt = async (firebaseJwt) => {
const publicKeys = await getPublicKeys();
const decodedToken = await jwtVerify(
firebaseJwt,
async (header, _alg) => {
const x509Cert = publicKeys[header.kid];
const publicKey = await importX509(x509Cert, "RS256");
return publicKey;
},
{
issuer: `https://securetoken.google.com/${firebaseProjectId}`,
audience: firebaseProjectId,
algorithms: ["RS256"],
}
);
return decodedToken.payload;
};

try {
// This will throw an error if the token is invalid
const tokenData = await verifyFirebaseJwt(token);
console.log(`We got a valid token`, tokenData);
} catch (err) {
console.error(`Invalid Token`, err);
}

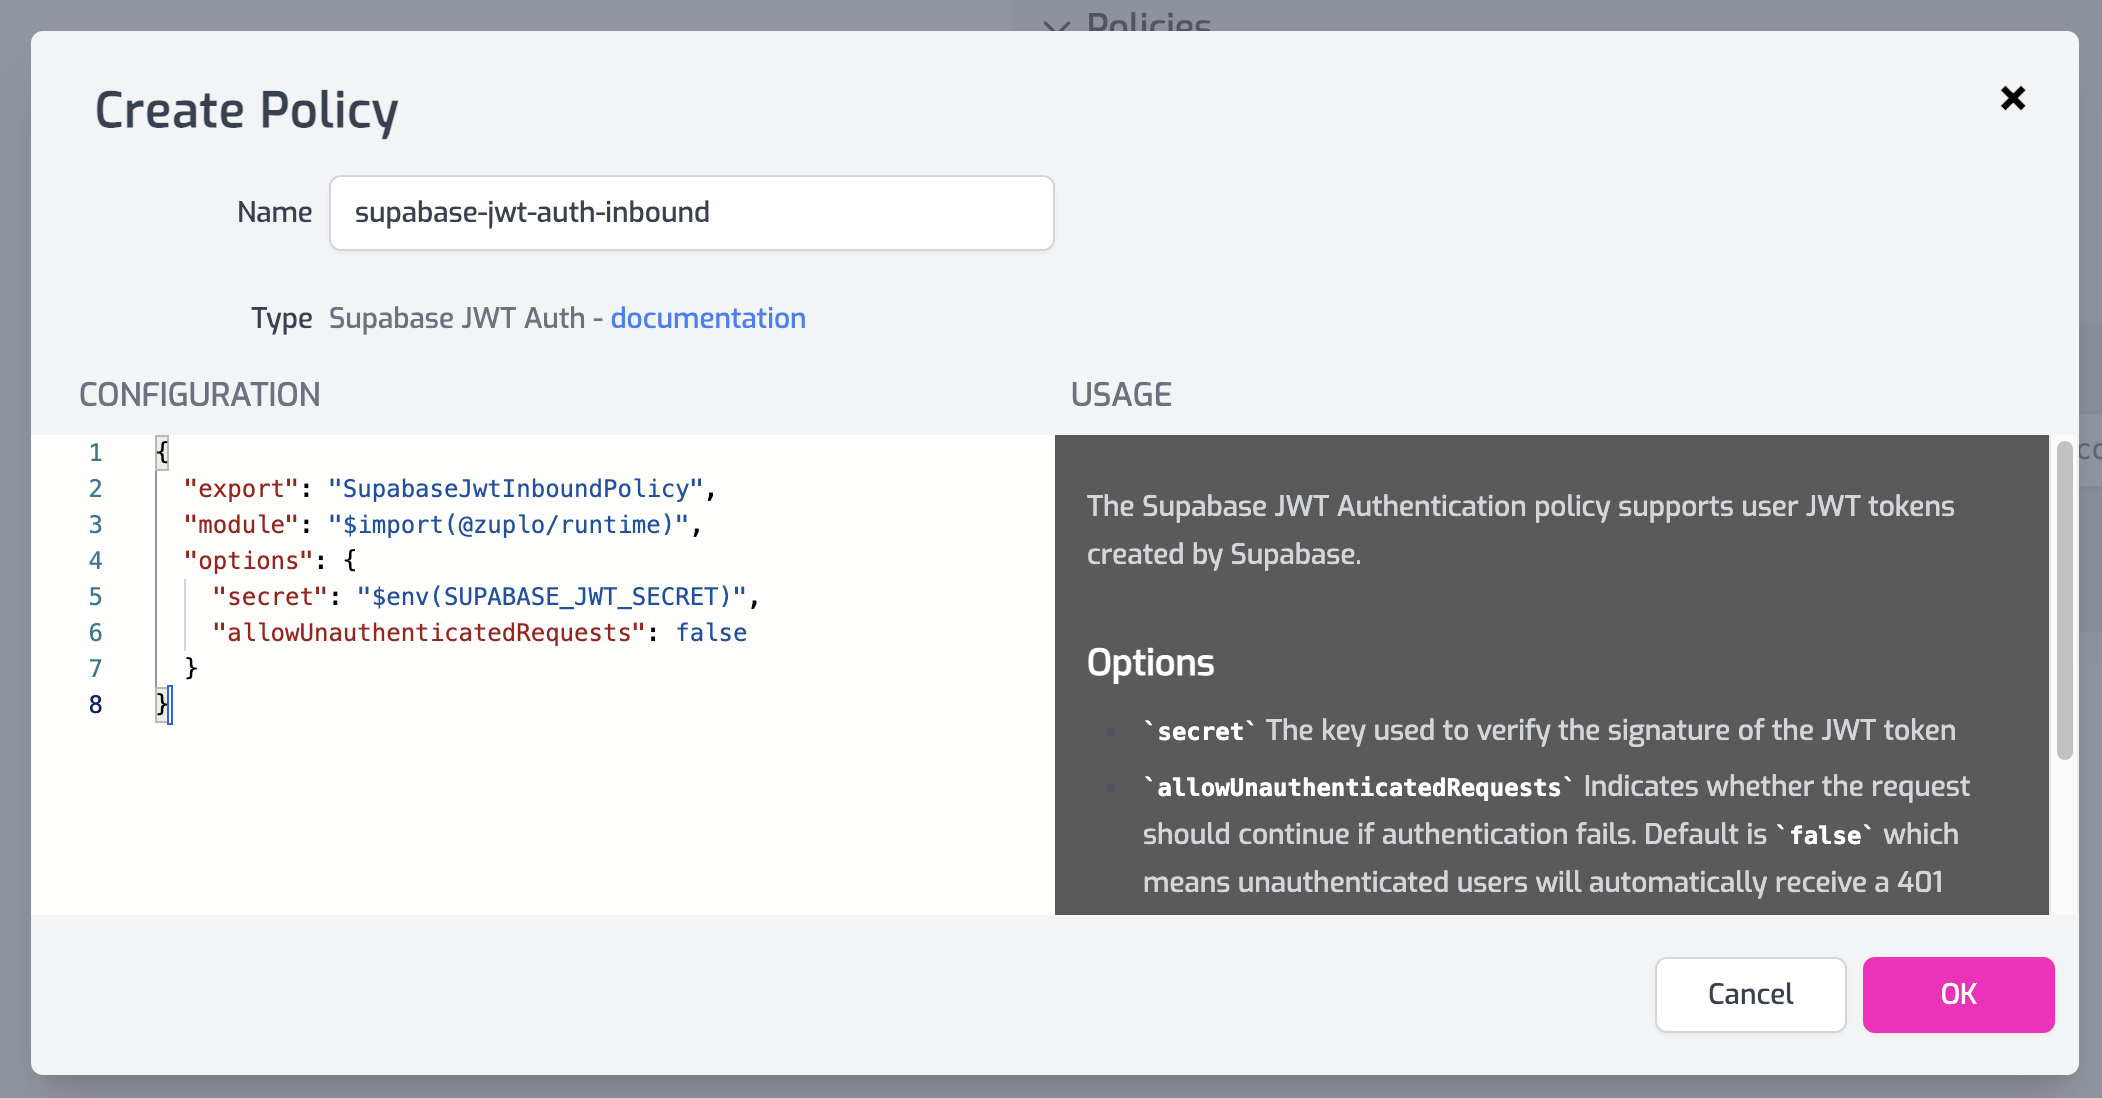
Hope you find that useful. Of course, you could always sign up for a free Zuplo account at portal.zuplo.com and get Firebase JWT auth as easy as configuring a policy 👏 👏 👏

· 2 min read
Josh Twist

Your supabase backend is often exposed to the public, anybody can sign in create an account and work with data. This can be a problem, if you get a malicious or clumsy user that is hitting your service too hard. That's where you need rate-limits, a way of making sure a single user doesn't starve others of resources (or cost you too much $).

With Zuplo, you can add user-based rate-limiting to a supabase backend in a couple of minutes. There is a video tutorial version of this guide here: YouTube: Per-user rate limit your supabase backend.

Best of all, the only code you'll need to change in your client is the URL of the supabase service (because traffic will now go via Zuplo).

Here are the steps

1/ Create a new project in Zuplo (get a free account at portal.zuplo.com).

2/ Add a route to your new project. Set the following properties

  • path: /(.*) - this is wildcard route that will match all paths
  • methods: all - select all methods in the dropdown
  • CORS: anything goes - this is easiest, but you can set stricter policies
  • URL Rewrite: <https://your-supabase-domain>${pathname} - make sure to add your supabase URL, e.g. https://rxodffgalrhwpvjugcio.supabase.co${pathname}

3/ Add a policy to the request pipeline - choose the supabase-jwt-auth policy. Remove the required claims from the JSON template.

{
"export": "SupabaseJwtInboundPolicy",
"module": "$import(@zuplo/runtime)",
"options": {
"secret": "$env(SUPABASE_JWT_SECRET)",
"allowUnauthenticatedRequests": false
}
}

4/ Create an environment variable called SUPABASE_JWT_SECRET (this is in Settings > Environment Variables). Paste in the JWT Secret from supabase (available in Settings > API).

Environment Variable

5/ Add a rate-limiting policy at the end of the request pipeline. Configure it to be a user mode rate limit, suggest 2 requests per minute for demo purposes.

Rate Limit Policy

{
"export": "RateLimitInboundPolicy",
"module": "$import(@zuplo/runtime)",
"options": {
"rateLimitBy": "user",
"requestsAllowed": 2,
"timeWindowMinutes": 1
}
}

6/ Get the URL for your gateway by going to Getting Started tab and copying the gateway URL. Replace the Supabase URL in your client and boom 💥!

Getting Started

You now have a rate-limit protected supabase backend. Stay tuned for a subsequent tutorial where we'll show how to ensure folks have to come via Zuplo to call your Supabase backend.

Got questions or feedback, join us on Discord.

· One min read
Josh Twist

We've recently been playing with Supabase a lot and showing how Zuplo can help you take your Supabase backend and go "API-first".

Often times, this requires you to have a JWT token from Supabase for testing. Since we're very focused on the API and backend of your infrastructure I got tired of creating test websites to login to Supabase and get myself a valid JWT. For that reason, we created a free online tool to help you get a JWT token from supabase for testing.

It's easy to use and the instructions are on the homepage. Also, check out this short video for a quick guide:

It's open source too - contribute on github

· 4 min read
Josh Twist

This guide shows you how you can use a Zuplo API gateway to add Supabase JWT Authentication and Authorization to any API, running on any cloud.

There is an accompanying video talk for this blog post: https://youtu.be/UEeSZkV7o_Y

Untitled

Zuplo is an edge-based programmable API gateway that can augment any existing backend HTTP API to add JWT authentication, dynamic rate-limiting, custom transformations and projections of JSON data.

Zuplo is a fully managed service, sign-up at zuplo.com to try it out.

In this example, we’re going to add Supabase JWT authentication and authorization to a demo API and turn on rate-limiting. We’ll use the JSONPlaceholder todo API available at https://jsonplaceholder.typicode.com/todos. For ease of demonstration, this is a public API, but Zuplo has a number of options for secure connectivity to a backend API.

Step 1: Proxy your API using Zuplo

Sign-in at portal.zuplo.com and create a new project. Click on the Routes item in the file list. You will see that you have no routes.

Click Add Route and configure the route as follows:

  • Method: GET
  • Path: /todos
  • Summary: Get my todos
  • Version: none
  • CORS: Anything Goes (you can configure custom CORS policies later).

In the Request Handler section, set the URL Rewrite path to https://jsonplaceholder.typicode.com/todos

Untitled

Click the save icon next to the Routes link (or press CMD+S/CTRL+S) to save your changes.

Your gateway is now ready to proxy requests to the todo API! To try it, click the Open Route link (shown below)

Untitled

Step 2: Add JWT Authentication

Next, expand the Policies section of your route and click Add Policy to the Request pipeline.

Untitled

Find the [Supabase JWT Auth policy](https://zuplo.com/docs/policies/supabase-jwt-auth-inbound) and select it. Edit the Configuration to remove the requiredClaims property (we’ll set those up later) and click OK.

Untitled

Finally, go to the Settings tab, choose Environment Variables, and add a new variable called SUPABASE_JWT_SECRET.

Untitled

The value of the secret can be obtained from your Supabase Settings in the API section.

Save your changes by navigating back to the file tab and clicking the Save icon next to Routes. Congratulations, you have now secured your todos API with a Supabase JWT token!

You can try calling this using a JWT token from a client (web, mobile, postman, curl etc) and sending the JWT token as the Authorization header, with a value "Bearer JWT_TOKEN_HERE".

Reminder, you can get the URL of your API using the Open In Browser button we used above or, on the Getting Started page, you’ll see the root API.

Step 3 - Enforce required claims

You can add custom claims to your user(s) in Supabase by adding them to the auth.users tables raw_app_metadata column (there’s a good article on this here).

These custom claims are encoded into the JWT token and we can use them to restrict access to our API. For this example, we updated the raw_app_metadata to have a custom claim of user_type. Note that we left the other claims in place.

UPDATE auth.users SET raw_app_meta_data =
'{"provider":"email", "providers":["email"], "user_type": "supa_user"}'
WHERE id = 'user_id_here';

Now we can require that anybody calling our API has a specific claim. To do this we update the requiredClaims property on our policy configuration. Go back to the Route Designer and find your Supabase JWT policy. Click the edit button and change the Configuration as follows:

{
"export": "SupabaseJwtInboundPolicy",
"module": "$import(@zuplo/runtime)",
"options": {
"secret": "$env(SUPABASE_JWT_SECRET)",
"allowUnauthenticatedRequests": false,
"requiredClaims": {
"user_type": ["supa_users"]
}
}
}

This means anybody calling this particularly route must have a user_type claim of supa_user to successfully invoke this API.

Get started with Zuplo for free today: Sign Up Free

See also:

Shipping a public API backed by Supabase

Supa-dynamic rate-limiting based on data (using supabase)